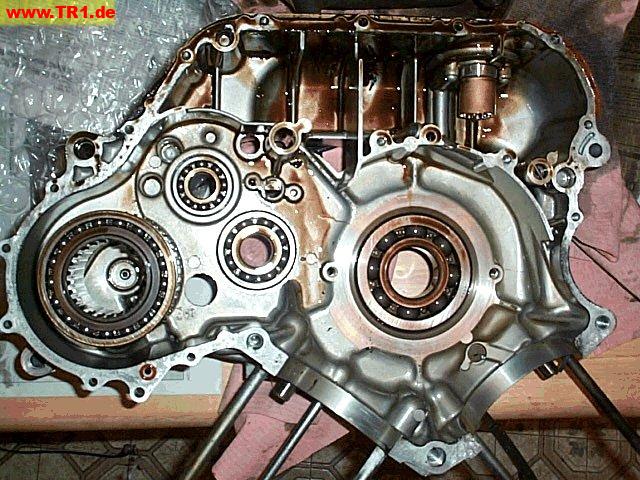
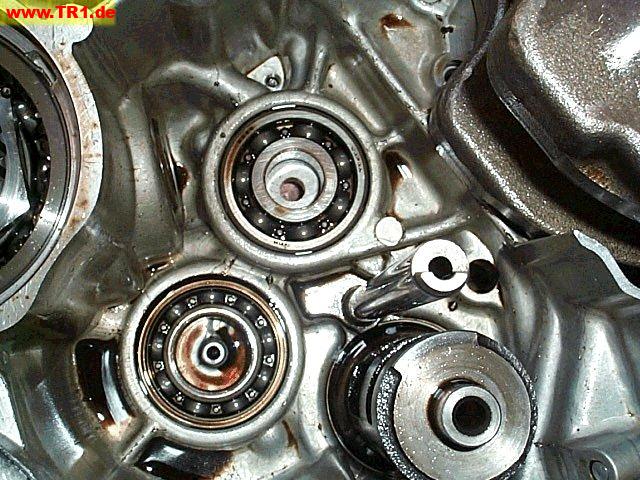
Here’s the right-hand case half, front to right, upside-down.
Bearings are (left-to-right): middle drive shaft, drive axle, main shaft, and crankshaft.
The oil level sensor is in the top-right of the picture. (There is no oil pressure sensor.)
About 5 o’clock from the oil level sensor is the oil pressure relief valve: it looks like a brass-colored ring with a cotter pin through it.
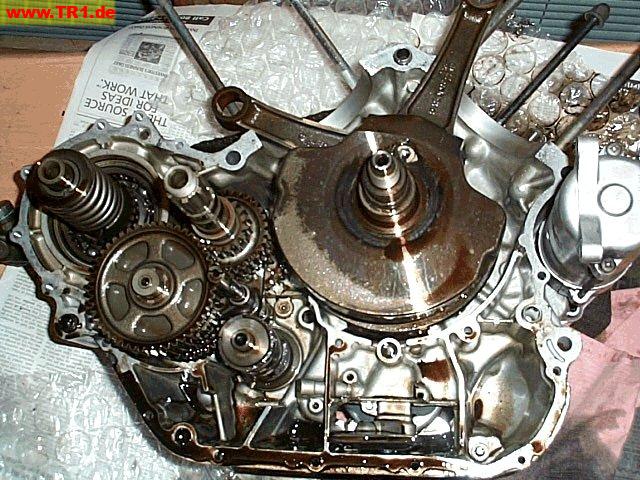
Left case half; front is to the right.
Seen left-to-right: middle drive shaft, transmission drive axle , transmission main shaft, crankshaft, and starter motor.
To the right of the transmission drive axle is the shifter fork shaft; below this is the shifter drum.
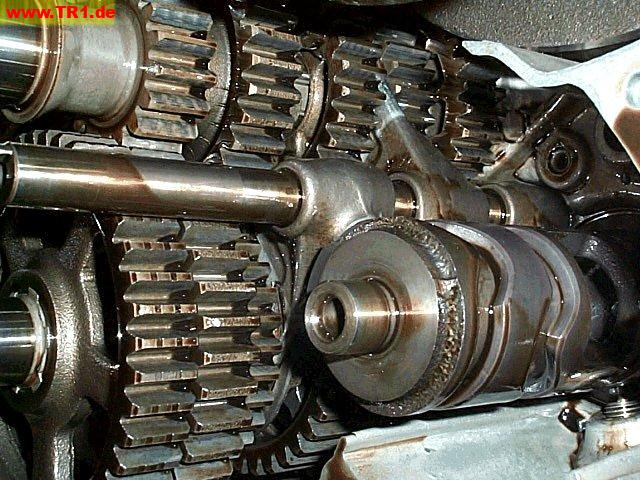
Looking backwards towards the left rear case half; top is up.
The transmission main shaft is seen at the top left; the transmission drive axle is seen at the bottom left.
The shifter drum (seen at the bottom right), moves each of the three shifter forks left/right along the small shifter fork shaft.
The three shifter forks are attached to the shifter fork shaft. Shifter fork #1 is nearest the left-hand case-half.
We’ve removed the transmission, exposing both left side cover transmission bearings.
The upper bearing supports the transmission main shaft; the clutch pushrod hole is visible. The lower bearing supports the transmission drive axle; the lubrication hole is visible. The shifter drum (lower-right) and shifter fork shaft (just above the drum) are at the bottom right.
Before removing the transmission, we removed the shifter fork shaft, removed the shifter forks, and replaced the shaft. Both transmission shafts and gears must be removed together, as the gears overlap one another.
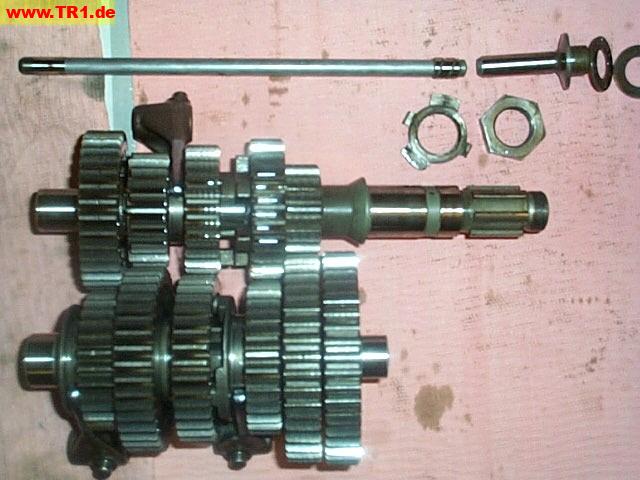
Here’s the transmission.
The clutch pushrods and stuff (top row) were removed previously. These pushrods live inside the hollow transmission main shaft.
The transmission main shaft splines (middle row, right) mate to the clutch inner basked (clutch boss).
The transmission drive axle “middle drive gear” (bottom row, rightmost gear) mates with the “middle drive shaft” gear in the right-hand case half (not shown).
Yamaha identifies gears that are on the main shaft as ‘pinion gears’, and gears that are on the drive axle as ‘wheel gears’. Functionally, the main shaft is the “transmission input shaft”, and the drive axle shaft is the “transmission output shaft”, so it may be more descriptive to call pinion gears “input shaft gears”, and call wheel gears “output shaft gears”.
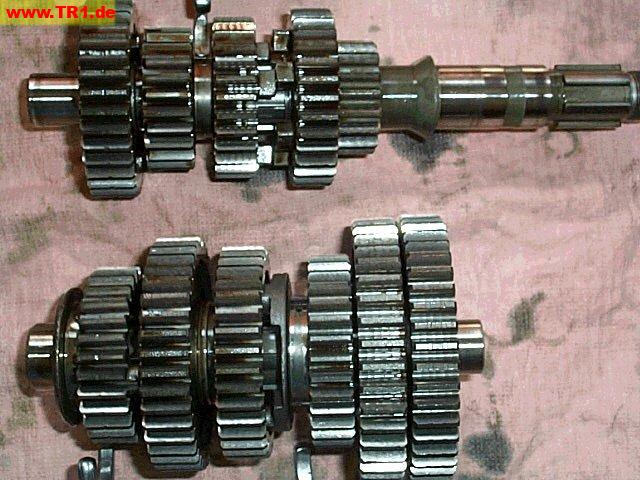
Transmission main shaft (top) and transmission drive axle (bottom).
From left-to-right: The transmission gears are numbered 5-2-3-4-1 from left to right. The middle drive gear (bottom right) functions as a transmission output gear, so it isn’t numbered.
The relationship between the pinion gear number and gear diameter is apparent in this image – the smaller the gear number, the smaller the pinion gear size.
‘First gear’ is provided by pinion gear 1, the rightmost (and smallest) gear on the mainshaft (pinion shaft).
‘Fifth gear’ is provided by pinion gear 5, the leftmost (and largest) gear on the mainshaft (pinion shaft).
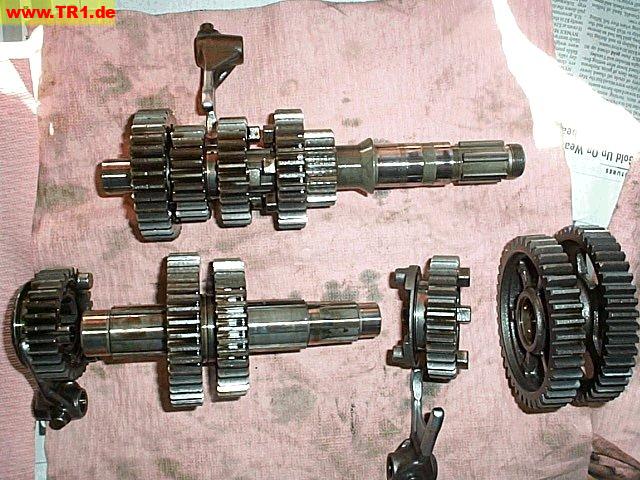
All of these numbered gears are either bushed, splined, or cast.
In this image, bushed (freely-rotating) gears are identified with round plastic circles. These gears turn freely on their shafts, but have gear dogs that can lock to an adjacent shifter gear. Note that exactly one gear of each speed (1,2,3,4,5) is bushed.
| shaft | gear 5 | gear 2 | gear 3 | gear 4 | gear 1 |
|---|---|---|---|---|---|
| mainshaft (input) | bushing | spline | spline | bushing | cast |
| drive axle (output) | spline | bushing | bushing | spline | bushing |
Transmission mainshaft gear 2/3 is a single piece.
All of these splined gears can be slid left/right by a shifter fork.
| shaft | gear 5 | gear 2 | gear 3 | gear 4 | gear 1 |
|---|---|---|---|---|---|
| mainshaft (input) | fork 2 | fork 2 | |||
| drive axle (output) | fork 1 | fork 3 |
Transmission mainshaft gear 2/3 is controlled by a single shifter fork.
All transmission gears are constantly meshed. To select a desired speed, one of the three shifter forks moves its splined gear to lock with a bushed gear to the left or right of it (on the same shaft). If none of the gears is locked, the transmission is in neutral.
Shifting:
1st speed: fork#3 (bottom right) slides to right, locking drive_axle gear 4 to 1.
2nd speed: fork#1 (bottom left) slides to right, locking drive_axle gear 5 to 2.
3rd speed: fork#3 (bottom right) slides to left, locking drive_axle gear 3 to 4.
4th speed: fork#2 (top) slides to right, locking main_shaft gear 3 to 4.
5th speed: fork#2 (top) slides to left, locking main_shaft gear 2 to 5.
Neutral: the mainshaft and driv_axle_shaft turn independently.
http://howstuffworks.com/ is also a good resource. Search for ‘transmission’.)

Wheel gears 2, 3 and 4 (left to right) on the axle shaft (lower shaft).
Wheel gear 4 (rightmost) is about to be slid off the shaft to the right.
Note the splines that prevent the gear from turning on its shaft, but allow the gear to slide left or right.
The oil feed hole on gear 4’s shifter fork slot, and the associated gear 4 shaft oil hole, are visible. I don’t know if there’s a recommended alignment for these oil holes.

The three gears at the lower-right, separated from the transmission drive axle, are 4, 1 and the middle drive gear. The two gears remaining on the drive axle shaft are prevented from sliding left or right by circular clips on the shaft adjacent to the gears.
Though not apparent, these two gears are bushed (not splined), sit on a smooth (not splined) section of the shaft, and spin freely. (Hmmm, another picture would be helpful.)
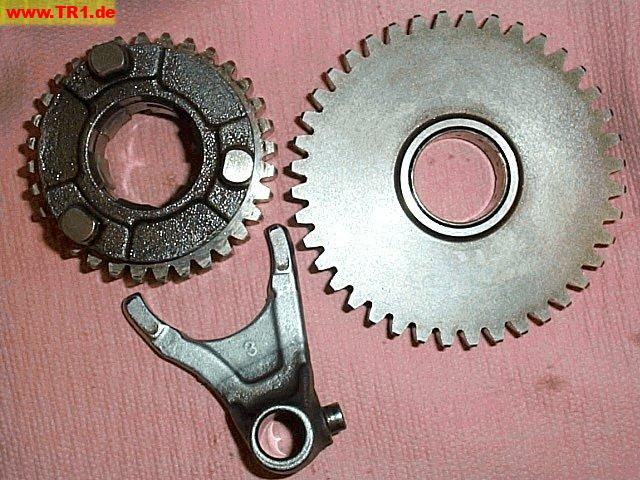
Wheel gears 4, 1 and shifter fork 3.
These gears lock together to engage first gear, and are our current interest.
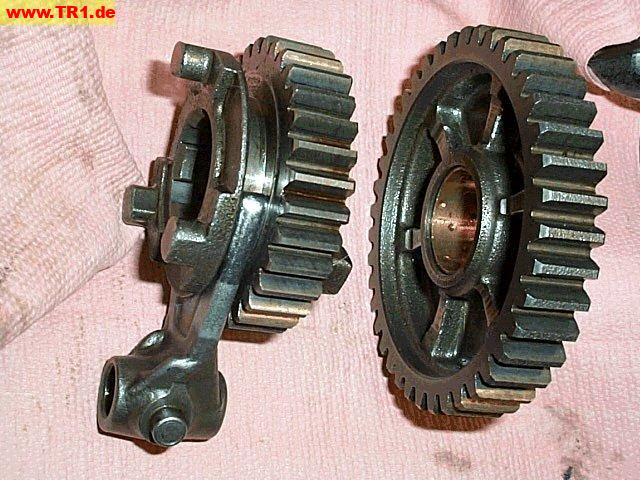
Wheel gears 4, 1 and shifter fork 3.
Wheel gears 4,1 and shifter fork 3.
Wheel gear 4 is splined to the drive axle; wheel gear 1 has a bushing and is free to turn.
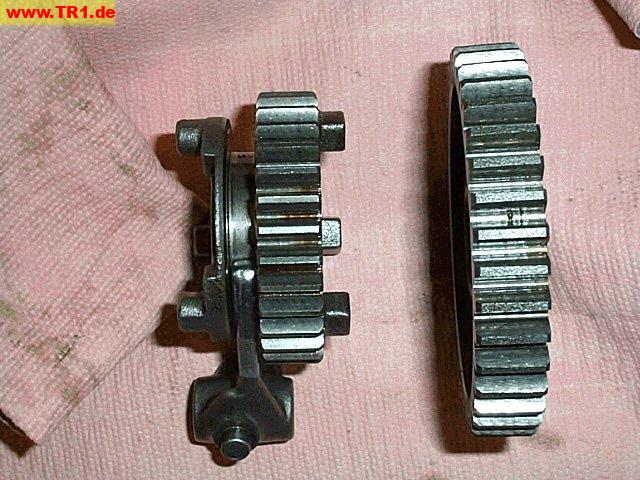
Wheel gears 4 and 1.
Wheel gear 1 ribs are no longer geometrically mellow.
If these parts push apart under torque, wheel gear 4 bends its fork, and first gear will momentarily slip. This happens.

Wheel gear 1.
The rib sides are no longer perfectly straight.
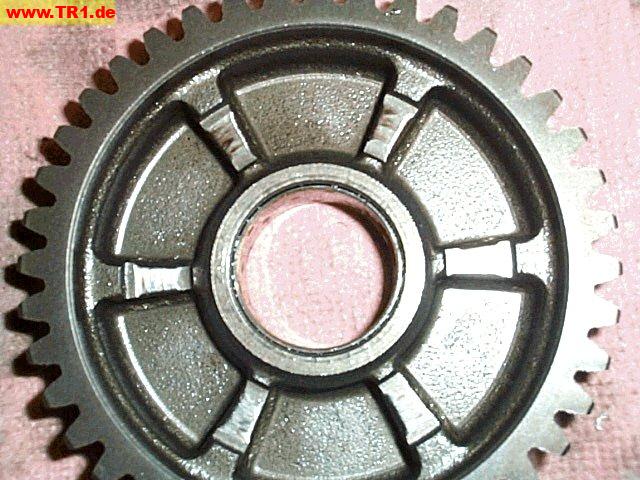
Wheel gear 1 again, but edge-detected and sharpened.
The rib sides are no longer flat.
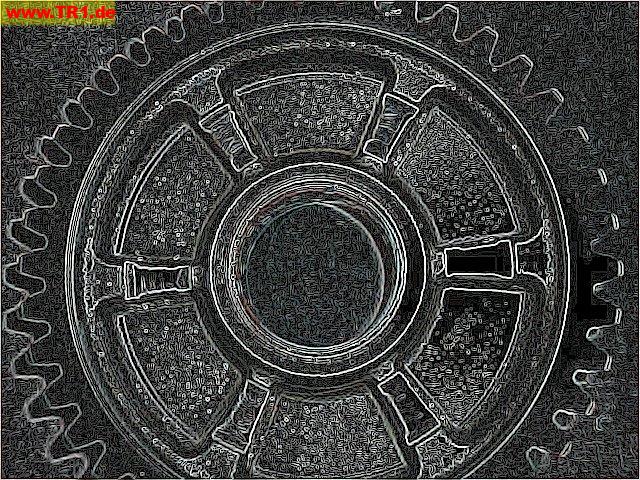
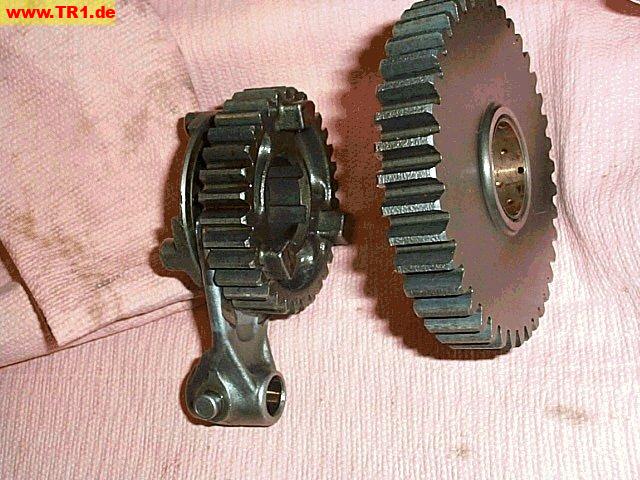
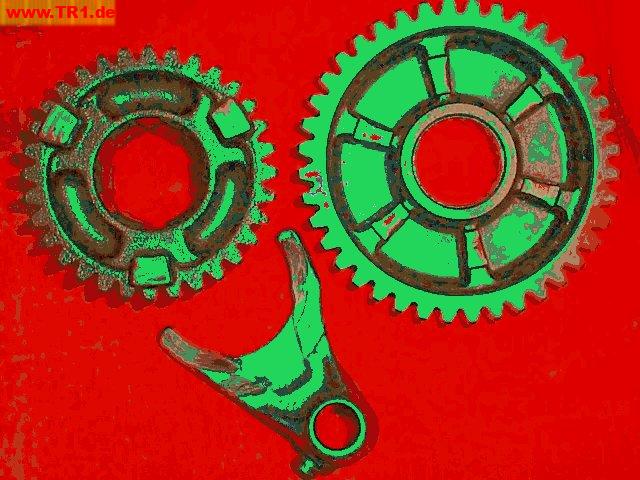
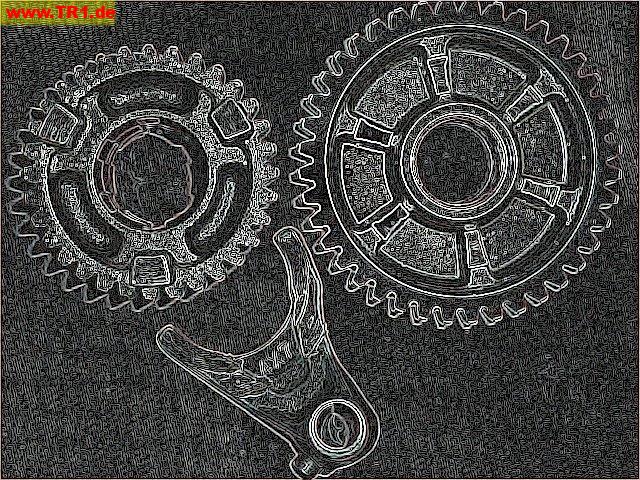
Wheel gear 4, shifter fork #3, and wheel gear 1.
The surfaces visible here face towards each other.
All parts are deformed and burned.
These parts have not been happy.

Here’s a false-colour image which tends to highlight the damage.
Here’s the original image, but with edge-detect and sharpen.
Wheel gear 4, shifter fork #3, and wheel gear 1.
The surfaces visible here face away from one another.
Note identification numeral marked on fork.